

Shower door seals are an important component in preventing water leaks and maintaining a watertight seal in your shower. Over time, seals can wear away, allowing water to seep in and cause potential damage to the surrounding area. Installing a new shower door seal is a relatively simple process that can be accomplished with a few basic tools and careful attention to detail. In this article, we’ll guide you through the steps to effectively install a shower door seal.
Before starting the installation process, it is important to gather the necessary materials. You will need a new shower door seal, a utility knife, a tape measure, and cleaner. Additionally, it’s a good idea to have a rag or towel ready to wipe down the area where the seal will be installed.
The first step in installing a shower door seal is to remove the old, worn seal. Use a utility knife to carefully cut along the edge of the old weatherstripping to loosen it from the door. After removing the old seal, use a cleaning solution to thoroughly clean the area where the new seal will be installed. This will ensure that the new strip adheres properly and creates a tight seal.
Next, measure the length of the shower door where you want the seal to be installed. Use a tape measure to determine exactly the length of strip required. It is important to measure carefully to ensure that the new strips will fit the door perfectly and provide a complete seal.
Once you’ve completed your measurements, you’re ready to install your new seal. Most sealing strips come in standard lengths and can be easily trimmed to fit your specific shower door. Use a utility knife to carefully trim the weather strip to the correct length based on the measurements you took earlier. Always check the dimensions carefully before cutting to avoid any mistakes.
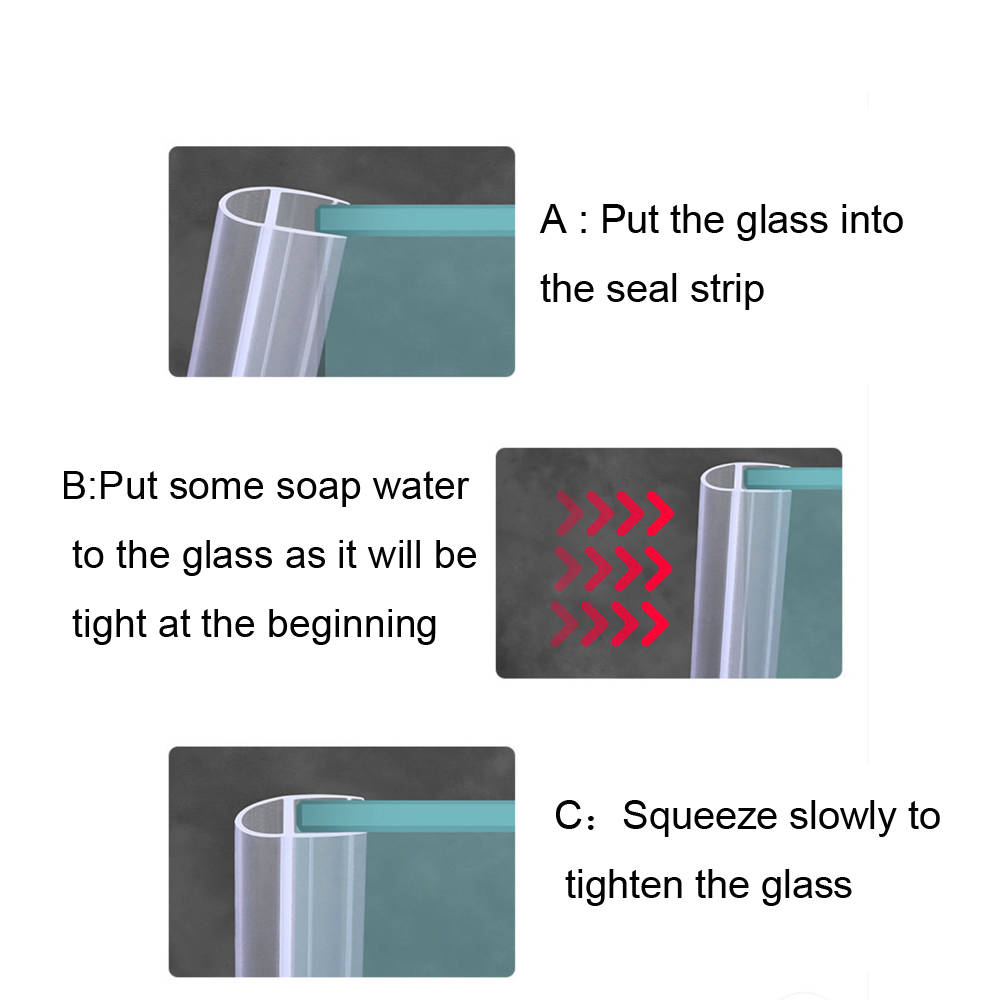
Once you’ve trimmed the weather strip to the correct length, you can install it on your shower door. Starting at one end of the door, carefully press the weather strip into place, making sure it adheres firmly and creates a tight seal. Work along the entire length of the door, pressing the strip into place as you go. Once the strip is installed, use a rag or towel to press firmly along the entire length of the strip to make sure it’s securely fastened to the door.
After installing the weatherstripping, it’s important to test the door to make sure it creates a watertight seal. Close the door and water the area where the seal is installed. Check for signs of water leakage and make any necessary adjustments to the waterproofing strips as needed.